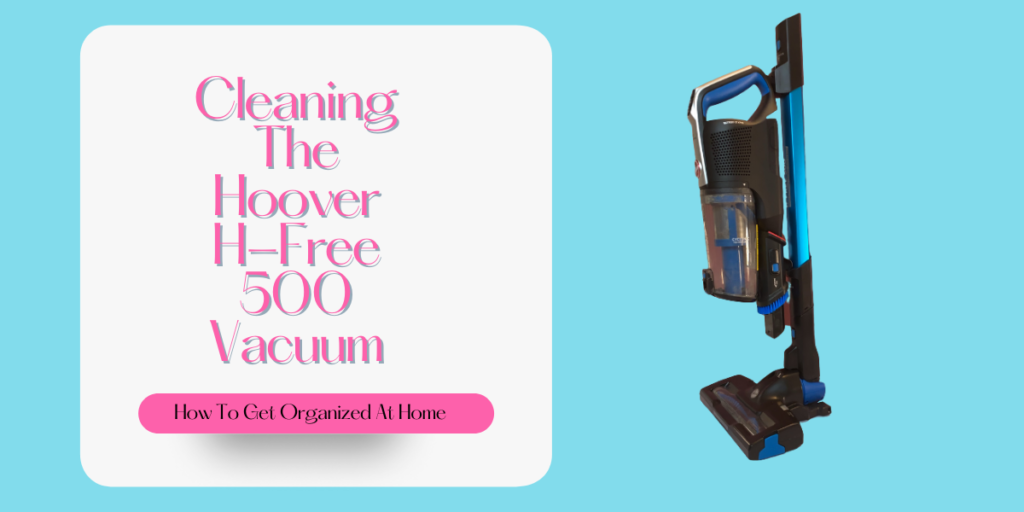
Cleaning The Hoover 500 H-Free Vacuum
If you have ever used a bagless vacuum you know that it’s important that you keep the vacuum clean. It’s your responsibility to keep all the areas that, if you had a bagged vacuum, would be protected from dust and debris.
What happens if you don’t keep your vacuum clean it will lose power, it might stop working and the life of the machine is going to be a lot less than if you took care of it.
Not cleaning puts a strain on the battery and the life of the vacuum and you could prematurely reduce the life of your vacuum.
Why I Find The Vacuum Easy To Clean
As I get older I do find the weight of products a concern, I can’t lift as much as I used to and that I think is one reason I love to grab the Hoover H-Free cordless vacuum, it’s so light.
So, when it comes to cleaning, I haven’t got to lift heavy parts onto the kitchen counter to get them clean.
It’s also compact and has a handy storage mode that I just love, it makes it easier to hide away. I don’t want my vacuum on show all the time and with it being convenient to store in small spaces it makes it one of the best vacuum cleaners out there in my opinion.
Related article: My Honest Review Of The H-Free 500 Pet Model
Cleaning Products To Use
When it comes to cleaning your vacuum there are a few items you might need to have on hand before you start.
Affiliate links are included for your convenience. (Which means if you make a purchase after clicking a link I will earn a small commission which won’t cost you a penny more!) Click here to read my full disclosure and privacy policy.
Microfiber cloths Bucket for your water or the kitchen sinkToothpicks if you want to get into all the crevices
You will need a safe place to leave the parts of the
How To Clean A Cordless Vacuum Cleaner
The first thing that you must do is remove the battery. You don’t want to accidentally get this wet as this could cause damage to the battery and to you.
I love a bagless and cordless vacuum because it means I can just carry it around and just empty it as it is full. But this comes at an extra price of the time you need to consider you will have to put into keeping the vacuum clean and dust free.
It’s important to read the manufacturer’s instructions on what is the best way to keep your vacuum dirt and dust free and I will admit I love the maintenance side of having a vacuum that you can wash.
It appeals to my clean side, I don’t want to vacuum with a dirty machine.
Taking Apart The Machine
Once you have removed the battery it’s important to take the vacuum down to the smallest parts so you can get them clean and dirt free.
As per the recommendations of the instructions I didn’t use any chemicals when it came to the cleaning, I just used warm water, my hand and a cloth that was just damp to wipe over the surface of the product.
So, when it comes to the buttons like the carpet button, the turbo mode and the on button I just wipe these with a damp microfiber cloth because I know they will pick up the germs that aren’t visible to the naked eye.
LED Light
I know that a lot of
Which is why I want to make sure that when I’m cleaning the base unit I am taking care not to damage anything but to also make sure that I’m giving those lights an extra polish so they show me the dirt in my home.
The Crevice Nozzle
I love that so many functions can be possible with this vacuum and for the video that is in this article I haven’t cleaned the motorized mini turbo brush as it isn’t used as much as the main vacuum so it missed out on a deep clean.
However, because the crevice tool that sits on the vacuum at all times did manage to get a wipe over with the
Carpet Mode
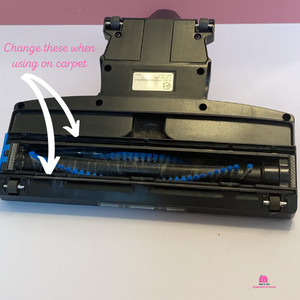
I pull out the 2 sections for the carpet mode on the bottom near the rotating brush bar. I do this so I can wipe them and check that they are still in good working order. When I put the machine back together once it’s all dry I will put these back.
Drying Time
You must give all the parts of the vacuum at least 24 hours drying time. Water and electricity don’t mix and you don’t want to damage your vacuum so making sure all the parts are dry before putting it back together again is so important.
I tend to give my vacuum about 36 hours of drying time as I find that after this time it’s really dry and won’t damage the vacuum in any way.
Also, if you put something that is wet back into the vacuum it could start to smell and it will be a nasty musty smell and you will have to replace the filter to get rid of this smell.
Why Look After Your Vacuum
As with any new vacuum you pay good money for the appliance and if you want that appliance to last you need to look after it.
You want to get value for money and to do this you need to look after it and to keep it clean and in full working order.
Getting the fine dust out of your vacuum is important, it’s what can block up the vents and this will cause the battery to wear out and you will put undue stress on the motor too.
Related article: Corded Versus Cordless, Which One Will You Buy?
Pin This:
I Love The Hoover H-Free
When it comes to vacuums I do love a
As a cordless vacuum it can actually stand up on it’s own and I think this really is a game changer. I give up with the amount of times I have leaned a cordless vacuum up against the wall and it has slipped down the wall marking it on the way.
Seriously, it stands up by itself and this means I don’t have to find a spot to put my vacuum when I’m moving something to vacuum around it, I just click it into the standing position and I know it’s going to stay there.
I have only ever seen this feature on a corded vacuum, so for me this is an amazing idea and one that I love.
Pet Hair & Cleaning
When it comes to cleaning I have multiple dogs in my home and so, yes, I have a lot of dog hair to deal with, but what I love about the Hoover is the ability to pick this up without it all just getting tangled in the brush.
There is nothing worse than having to clean the brush head constantly because it’s completely blocked.
Related article: How To Clean Up The Pet Hair In Your Home
Don’t Forget The Attachments
I won’t be telling you to wash or submerge any of the attachments or battery. But I do recommend wiping over the extra battery, the wall mount, the charger plug and the floor nozzle.
Not only is this to remove any dirt and dust that has accumulated but also so you can check to make sure nothing is broken so when you next use the furniture tool, or the attachment for soft furnishings it isn’t going to damage items in your home.
Putting It Back Together
Once the vacuum is completely dry then slowly put everything back together. You don’t want to have spare parts, that’s not the object of the task.
Make sure everything is in the right place before putting the battery back in and testing the machine is in full working order.
Let’s Recap…
We all know the
It is a known fact that if you go bagless there is going to be cleaning involved, otherwise you are going to burn out your motor or complain that the vacuum doesn’t work.
So, cleaning is the key to the maintenance of any vacuum, but it’s worth the effort that you put in because it extends the life of the vacuum and this means your money isn’t wasted.
Don’t get any of the electrical points wet.
Remove and clean the parts that are washable and remember to dry them before putting the machine back together.
Put the parking position on and admire the hard work and dedication you took to look after an amazing vacuum cleaner that is tough on cleaning tasks but still needs some love in return for the work it puts in keeping your floors looking clean.


