How To Clean Your Oven In 3 Quick Sessions
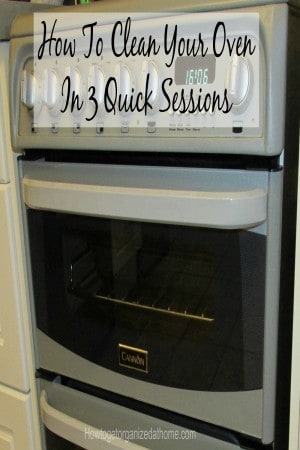
If you use my tips to clean your oven, it becomes less of a boring chore! Cleaning the oven is a boring task and this is just one reason I break this down into different sections, there is no way that I will clean all the oven properly if I try to do it all in one session. This is why I like to give myself three sessions to clean the oven; you can start in any order and tackle any task, but you will know that you have moved towards cleaning the whole oven. I break mine down into the 3 sessions, by doing the top, which is the hob, the middle oven and grill, then finally the main oven.
Affiliate links support How To Get Organized At Home
How To Clean Your Oven In Three Sessions
You do have a choice to clean your oven; there are companies that specialize in oven cleaning, they come to your house and clean it for you, whilst this is a great idea if you can afford it, for me I like to clean it myself because it is something I like doing or at least, seeing my oven clean.
The First Session
The main oven; this always seems as though it is a long and tough job, yet in reality, it isn’t that bad. I always keep a tray on the bottom of the oven to catch any spills and this is easily removable and cleaned at any point a spillage occurs. I think the worst part is kneeling down to clean the oven; I must just be getting old!
My oven glass panel is removable and I do this first, I take it out and place it on the side and put directly onto the glass a paste of bicarbonate of soda and water, with a dash of washing up liquid to break down any grease. I leave this to work whilst I focus on the rest of the oven.
Inside the oven, I like to wipe it out first, it gives me a sense of the task ahead. I clean my oven regularly so it doesn’t get too bad between cleaning, a quick paste spread around the bottom of the oven, the sides have self-cleaning panels. I leave this whilst cleaning the door and the racks.
To clean the racks, I use a scouring pad and washing up water, for any tough marks just screw up some tin foil and it will remove those tough stains. I have rented properties in the past and I have gotten my racks clean using this method, very rarely did I ever resort to using a knife to chip away a deposit build up on the racks.
All I need to then do is a quick wipe down, it does take a few wipes to get all the residue out of the bottom, the first task complete.
The Second Session
I leave the next session for another day, I know I won’t clean as well if I do too much at a time, so I schedule in session two for a day or two later. This is the hob and the front of the oven. I have gone into detail here, How To Get A Ceramic Hob Clean, this article goes into detail on how I get the hob clean, it is glass and if you don’t clean it regularly it does start to show.
It isn’t difficult but perhaps more elbow grease, if you have a large build-up of dirt. If this is the case don’t be discouraged, stick to the time limit you set, you just might need to do more than one session on this area. But once it is clean, keeping it clean after every use will have added benefits for the next time you do a deep oven clean.
The Third Session To Clean Your Oven
I schedule in this session no later than a week after I start the cleaning process, I know that it isn’t all cleaned in one session, but I know I will lose focus and it just won’t get cleaned to the standard I am looking for.
It will depend on your appliance if you have three areas to clean; my oven has a middle oven and grill. The grill pan lives here and if used to prevent a bigger task, washing up is a necessity.
This for me is the worse section; it isn’t that it gets dirtier, I just don’t like the problems that arise when cleaning! Again if you can remove the door, do so if not you will have to work around this problem area. I am able to remove mine and I cover the glass with a bicarbonate of soda, a dash of washing-up liquid and some water to make a paste and cover the glass door and leave it to work. I remove all items stored in here, trays and another pan live here, so I remove these and the cleaning process can begin.
I begin with a quick wipe down, this oven, the element is at the top because it is the grill too, so obviously it gets dirty, but I won’t clean it other than with water, I use bicarbonate of soda on the base, I put a paste on this and leave to work whilst cleaning the rack.
Again, make sure you remove all residue as it is more difficult to clean if left on and you then heat the oven, and there is a smell!
The oven is now clean and I know that all areas are cleaner.
Why I Choose Natural Cleaning Products
There is a reason for using natural cleaning products, I just don’t like the smell of those chemicals that are highly toxic to clean with; I feel that there is a better way.
I have cleaned ovens for many years to an extremely high standard, it had to look like brand new, never used or we faced a bill for a cleaning service. I have never had a bill for my oven and I have never used harsh chemicals on them to clean them.
I think part of this was due to moving into various different rented accommodation where the previous tenants used harsh chemicals. I then would clean the oven to remove these smells before use.
Therefore, the products I use to clean my oven are:
- Bicarbonate of soda made into a paste with warm water and a dash of washing-up liquid.
- Dishcloth for wiping and cleaning and a scouring pad for the difficult marks and scrunched up tin foil.
Therefore, cleaning the oven isn’t difficult and you don’t have to do it all at once. Break the tasks down over a period to suit you. This way you will clean your oven without the stress happening on the same day.





It goes without saying oven cleaning is one of the most hateful of them domestic chores. Plus, it’s tiring and most of the store-bought detergents are too invasive. While it can’t compare to the grease inside the oven cavity, the outside of the cooker around the hob burners and the buttons is also a daunting job. You’ll make them shine with:
Cotton tampon (or ear buds)
Several drops of anise-based alcoholic solution (absent for example or any other alcohol that contains anise)
old toothbrush
Soak the cotton tampon in the solution and wipe the dirty parts of the oven. Wait for several minutes and you will see the oil and dirt disappear. If the grime’s too old and stubborn, grate them out with the toothbrush, also soaked in the solution.
Then wipe the surface with a clean damp towel and dry it out 🙂
This sounds like an awesome tip! thanks for sharing 🙂
Great tip! I need this after the Thanksgiving cooking. Thank you!
You are so welcome 🙂 Thanks for visiting 🙂
I have to do the same thing by breaking up my cleaning into sessions! If you don’t mind I’d love to link to some of your content, I’m hosting a cleaning challenge and I think you have some great stuff that could be really helpful to a lot of people! Pinning this for when I get around to the oven. 😉
That sounds awesome! Let me know when you link something and I will share on social media too! 🙂